
How To Implement Passkeys with WebAuthn: Complete Developer Guide
A practical developer guide to passkey authentication and WebAuthn. Covers how passkeys work, registration and login flows, JavaScript code examples, best practices, and testing tips.
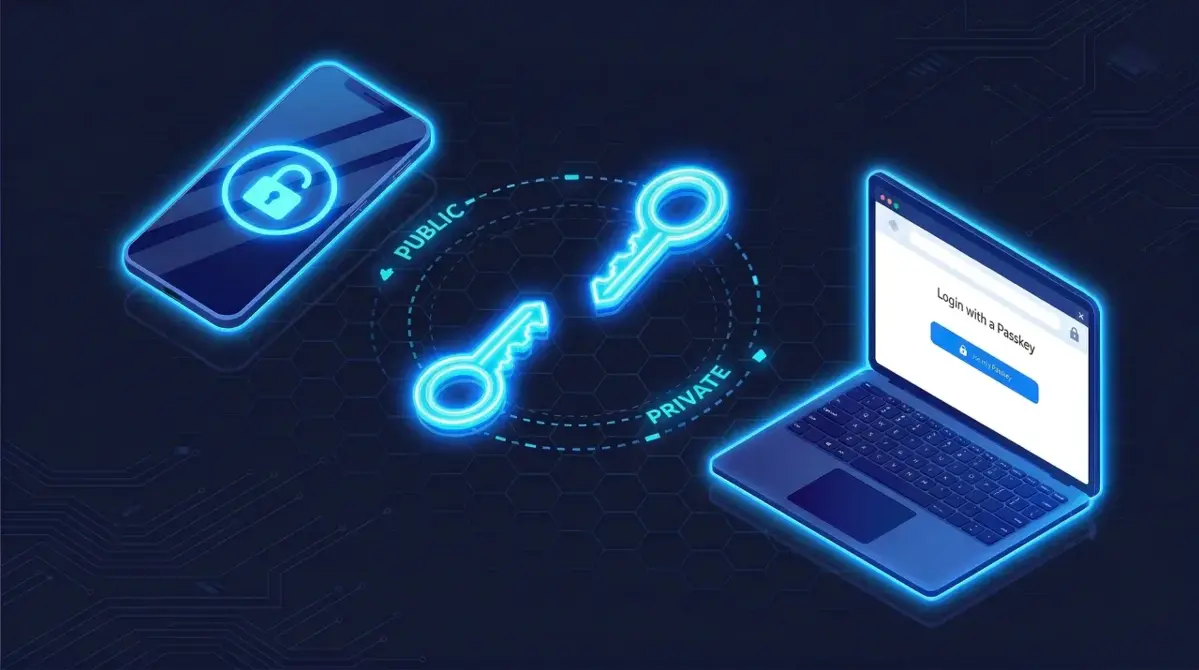
Passwords have been the default way to authenticate users for decades, but they continue to create security and usability challenges. Users forget them, reuse them across services, and often store them insecurely. For developers, password-based systems mean account recovery queues, phishing risk, and credential breach exposure.
Passkey authentication is the modern alternative. This guide walks through how passkeys work, what the WebAuthn API looks like in practice, and what you need to build a complete passkey implementation — from registration to passkey login.
Understanding Passkeys
A passkey is a passwordless credential that lets users sign in with a trusted device — a smartphone, laptop, or hardware security key — instead of a password. Under the hood, passkeys use public-key cryptography:
- A public key is stored on the application server.
- A private key is stored securely on the user's device and never leaves it.
During authentication, the server sends a random challenge to the device. The device signs it with the private key and returns the signature. The server verifies the signature using the stored public key. Because the private key never leaves the device, attackers can’t steal it through phishing or server breaches.
Passkeys are built on the FIDO2 standard, which combines two components:
- WebAuthn (Web Authentication API) — the browser-side API developers interact with directly
- CTAP (Client to Authenticator Protocol) — handles communication between the browser and external authenticators like hardware security keys
WebAuthn vs passkey — what's the difference? WebAuthn is the W3C API your code calls (
navigator.credentials.create()/.get()). Passkey is the user-facing name for a WebAuthn credential that syncs across a user's devices via iCloud Keychain, Google Password Manager, or a similar platform service. Every passkey is a WebAuthn credential — but a hardware key like a YubiKey is also WebAuthn and is not a passkey (it doesn't sync). All the code in this article is WebAuthn. It produces passkeys when the platform authenticator (Face ID, Windows Hello, Android Credential Manager) creates a syncable credential.
Why Developers Are Adopting Passkeys
Apple, Google, and Microsoft have all built passkey support into their platforms. Adoption is accelerating, and the reasons are practical:
- Phishing resistance. Passkeys are bound to the domain where they were created. A credential registered on
yourapp.comwon't work on a fakeyourapp-login.com. - No stored secrets to breach. Servers only store public keys. Even if your database is compromised, attackers get nothing they can use to impersonate users.
- Better UX. Users authenticate with Face ID, Touch ID, or a device PIN — no passwords to forget or reset.
- Lower support costs. Password resets are one of the top drivers of support tickets. Passkeys eliminate the problem at the source.
Prerequisites
HTTPS and Browser Support
WebAuthn only works over HTTPS. Make sure your app is served with a valid TLS certificate — there are no exceptions, even in staging environments (use localhost for local development, which is exempted).
Modern browsers — Chrome, Safari, Firefox, and Edge — all support WebAuthn. You can check current coverage on caniuse.com.
Backend Infrastructure
Your server needs to handle three things:
- Challenge generation — create a random, single-use challenge for each registration or login attempt
- Response verification — validate the signed assertion returned by the authenticator
- Credential storage — store public keys, credential IDs, and a signature counter per user
Don’t implement the cryptographic verification yourself. Use a well-maintained WebAuthn server library for your stack — for example, go-webauthn for Go, py_webauthn for Python, or @passwordless-id/webauthn for Node.js.
Account Recovery
Plan recovery before you launch. If a user loses their only registered device, they need a way back in. Common approaches: allow registering multiple devices, fall back to email verification, or support backup codes. Without a recovery path, locked-out users become support escalations — or lost customers.
How Passkey Authentication Works
Passkey authentication has two phases: registration (creating the credential) and passkey login (using it to sign in).
Registration Flow
Registration creates the key pair and links the public key to the user’s account.
- The user triggers passkey setup in your app.
- Your server generates a random challenge and sends it to the browser.
- The browser calls
navigator.credentials.create()with the challenge and your relying party info. - The OS prompts the user to verify — Touch ID, Face ID, Windows Hello, or PIN.
- The device generates a key pair. The private key is stored in the secure enclave; the public key is returned to your server along with a credential ID.
- Your server stores the public key and credential ID linked to the user's account.
Passkey Login Flow
- The user selects "Sign in with passkey."
- Your server generates a new random challenge.
- The browser calls
navigator.credentials.get()with the challenge. - The OS finds matching credentials and prompts for biometric/PIN confirmation.
- The device signs the challenge with the stored private key.
- Your server verifies the signature using the stored public key. If it matches, the user is in.
WebAuthn Example: Registration and Login
Here’s what the WebAuthn API looks like in practice. Two browser methods handle everything.
navigator.credentials.create() — Passkey Registration
// Call your server to get a registration challenge first
const response = await fetch('/auth/passkey/register/begin', {
  method: 'POST',
  headers: { 'Content-Type': 'application/json' },
  body: JSON.stringify({ userId: currentUser.id }),
});
const options = await response.json();

// The server returns PublicKeyCredentialCreationOptions.
// The browser needs the challenge decoded from base64.
options.challenge = base64urlToBuffer(options.challenge);
options.user.id = base64urlToBuffer(options.user.id);

// Trigger the authenticator
const credential = await navigator.credentials.create({ publicKey: options });

// Send the new credential to your server to store
await fetch('/auth/passkey/register/complete', {
  method: 'POST',
  headers: { 'Content-Type': 'application/json' },
  body: JSON.stringify({
    id: credential.id,
    rawId: bufferToBase64url(credential.rawId),
    response: {
      attestationObject: bufferToBase64url(credential.response.attestationObject),
      clientDataJSON: bufferToBase64url(credential.response.clientDataJSON),
    },
    type: credential.type,
  }),
});
navigator.credentials.get() — Passkey Login
// Get an authentication challenge from your server
const response = await fetch('/auth/passkey/login/begin', { method: 'POST' });
const options = await response.json();

options.challenge = base64urlToBuffer(options.challenge);
// If you pass allowCredentials, decode each credential ID too
if (options.allowCredentials) {
  options.allowCredentials = options.allowCredentials.map(c => ({
    ...c,
    id: base64urlToBuffer(c.id),
  }));
}

// Prompt the user — browser handles biometric/PIN UI
const assertion = await navigator.credentials.get({ publicKey: options });

// Send the signed assertion to your server for verification
const verifyResponse = await fetch('/auth/passkey/login/complete', {
  method: 'POST',
  headers: { 'Content-Type': 'application/json' },
  body: JSON.stringify({
    id: assertion.id,
    rawId: bufferToBase64url(assertion.rawId),
    response: {
      authenticatorData: bufferToBase64url(assertion.response.authenticatorData),
      clientDataJSON: bufferToBase64url(assertion.response.clientDataJSON),
      signature: bufferToBase64url(assertion.response.signature),
      userHandle: assertion.response.userHandle
        ? bufferToBase64url(assertion.response.userHandle)
        : null,
    },
    type: assertion.type,
  }),
});

if (verifyResponse.ok) {
  // User is authenticated — redirect or update UI
}
The base64urlToBuffer and bufferToBase64url helpers convert between base64url strings (what your server sends) and ArrayBuffer (what the WebAuthn API expects). You’ll need to implement these or use a library that handles the encoding for you.
⚠️ Common mistake: Sending the raw challenge as a string instead of an
ArrayBufferwill causenavigator.credentials.create()to throw. Always decode base64url values from your server before passing them to the WebAuthn API.
Implementing Passkeys on iOS (Swift)
If you’re building a native iOS app and want to know how to create a passkey on iPhone or how to set up passkey on iPhone, the AuthenticationServices framework is where you start. Apple added passkey support in iOS 16 — no third-party library needed.
Requirements
Before writing any Swift code, make sure three things are in place:
1. Associated Domains entitlement. Add the entitlement com.apple.developer.authentication-services.autofill-credential-provider to your app target, and add an associated domain entry webcredentials:yourdomain.com in your app’s entitlements file (or via Xcode’s Signing & Capabilities → Associated Domains).
2. apple-app-site-association file on your server. Your web server must serve the following JSON at https://yourdomain.com/.well-known/apple-app-site-association (no file extension, over HTTPS only):
{
  "webcredentials": {
    "apps": ["TEAMID.com.example.yourapp"]
  }
}
Replace TEAMID with your Apple Developer Team ID and the bundle identifier with your app’s bundle ID. The file must be served with Content-Type: application/json.
3. rpId matches the domain. The rpId you pass to the WebAuthn server (and that the server includes in its challenge response) must match the domain in your apple-app-site-association. A mismatch causes the OS to silently refuse the credential.
Face ID or Touch ID is invoked by the OS automatically during the passkey ceremony — you do not need to call LocalAuthentication directly.
Registration (creating a passkey on iPhone)
import AuthenticationServices

class PasskeyManager: NSObject, ASAuthorizationControllerDelegate,
                      ASAuthorizationControllerPresentationContextProviding {

    // Step 1: Fetch a challenge from your server, then call this.
    func registerPasskey(username: String, challenge: Data, userID: Data) {
        let provider = ASAuthorizationPlatformPublicKeyCredentialProvider(
            relyingPartyIdentifier: "yourdomain.com"
        )

        let registrationRequest = provider.createCredentialRegistrationRequest(
            challenge: challenge,
            name: username,       // displayed to the user in the system sheet
            userID: userID        // your app's user identifier, stored on device
        )

        // Optional: set attestation preference
        // registrationRequest.attestationPreference = .none

        let controller = ASAuthorizationController(
            authorizationRequests: [registrationRequest]
        )
        controller.delegate = self
        controller.presentationContextProvider = self
        controller.performRequests()
    }

    // Delegate: registration succeeded
    func authorizationController(
        controller: ASAuthorizationController,
        didCompleteWithAuthorization authorization: ASAuthorization
    ) {
        guard let credential = authorization.credential
            as? ASAuthorizationPlatformPublicKeyCredentialRegistration
        else { return }

        // Send these to your server to store against the user account
        let credentialID = credential.credentialID
        let attestationObject = credential.rawAttestationObject
        let clientDataJSON = credential.rawClientDataJSON

        // POST /auth/passkey/register/complete with the above data
    }

    func authorizationController(
        controller: ASAuthorizationController,
        didCompleteWithError error: Error
    ) {
        // Handle cancellation (ASAuthorizationError.canceled) separately
        // from other errors — users cancel legitimately
        print("Passkey registration error: \(error)")
    }

    func presentationAnchor(
        for controller: ASAuthorizationController
    ) -> ASPresentationAnchor {
        return UIApplication.shared.connectedScenes
            .compactMap { ($0 as? UIWindowScene)?.keyWindow }
            .first!
    }
}
Sign-in (passkey login on iPhone)
func signInWithPasskey(challenge: Data) {
    let provider = ASAuthorizationPlatformPublicKeyCredentialProvider(
        relyingPartyIdentifier: "yourdomain.com"
    )

    let assertionRequest = provider.createCredentialAssertionRequest(
        challenge: challenge
    )

    // Optional: restrict to specific credentials
    // assertionRequest.allowedCredentials = [...]

    let controller = ASAuthorizationController(
        authorizationRequests: [assertionRequest]
    )
    controller.delegate = self
    controller.presentationContextProvider = self
    controller.performRequests()
}

// Delegate: authentication succeeded
func authorizationController(
    controller: ASAuthorizationController,
    didCompleteWithAuthorization authorization: ASAuthorization
) {
    guard let credential = authorization.credential
        as? ASAuthorizationPlatformPublicKeyCredentialAssertion
    else { return }

    // Send these to your server for verification
    let credentialID = credential.credentialID
    let authenticatorData = credential.rawAuthenticatorData
    let clientDataJSON = credential.rawClientDataJSON
    let signature = credential.signature
    let userID = credential.userID  // your app's user identifier

    // POST /auth/passkey/login/complete with the above data
}
Common pitfalls
- Missing Associated Domains entitlement. The system sheet will never appear. Check Xcode → Signing & Capabilities → Associated Domains and confirm the entry is
webcredentials:yourdomain.com. apple-app-site-associationnot served correctly. It must be at/.well-known/apple-app-site-association, served over HTTPS with a valid certificate, and withContent-Type: application/json. Apple's CDN caches this file aggressively — allow up to 24 hours for changes to propagate.- Mismatched
rpId. TherelyingPartyIdentifierin Swift must exactly match therpIdyour server sends in the challenge response and the domain in theapple-app-site-associationfile. - Simulator limitations. Passkey registration and assertion on the iOS simulator may behave differently from a physical device. Use a real iPhone for final testing.
Implementing Passkeys on Android (Kotlin)
Android’s modern approach to passkeys is the Credential Manager API (androidx.credentials), introduced as stable in late 2023. It replaces the older FIDO2 API — if you find tutorials referencing Fido2ApiClient, those are outdated. Use Credential Manager instead.
Credential Manager requires API level 28 (Android 9) or higher. On Android 9–13, passkeys require Google Play Services. On Android 14+, full native support is available.
Requirements
Digital Asset Links file. Your server must host a assetlinks.json file at https://yourdomain.com/.well-known/assetlinks.json:
[{
  "relation": ["delegate_permission/common.handle_all_urls",
               "delegate_permission/common.get_login_creds"],
  "target": {
    "namespace": "android_app",
    "package_name": "com.example.yourapp",
    "sha256_cert_fingerprints": [
      "AA:BB:CC:DD:EE:FF:..."
    ]
  }
}]
Get your SHA-256 certificate fingerprint with:
keytool -list -v -keystore ~/.android/debug.keystore -alias androiddebugkey \
  -storepass android -keypass android
Use your release keystore fingerprint in production. Debug and release builds have different signing keys — a common source of assetlinks.json mismatches.
In your AndroidManifest.xml, add the Digital Asset Links association:
<activity ...>
    <intent-filter>
        <action android:name="android.intent.action.MAIN" />
    </intent-filter>
    <meta-data
        android:name="asset_statements"
        android:resource="@string/asset_statements" />
</activity>
Also add your domain to strings.xml:
<string name="asset_statements" translatable="false">
[{"include": "https://yourdomain.com/.well-known/assetlinks.json"}]
</string>
Add the dependency to build.gradle:
dependencies {
    implementation("androidx.credentials:credentials:1.3.0")
    implementation("androidx.credentials:credentials-play-services-auth:1.3.0")
}
The fingerprint biometric prompt is shown automatically by the OS — no BiometricPrompt setup is required.
Registration
import androidx.credentials.CreatePublicKeyCredentialRequest
import androidx.credentials.CredentialManager
import androidx.credentials.exceptions.CreateCredentialCancellationException
import androidx.credentials.exceptions.CreateCredentialException

suspend fun registerPasskey(activity: Activity, requestJson: String) {
    // requestJson is the JSON-serialised PublicKeyCredentialCreationOptions
    // from your server — challenge, rp, user, pubKeyCredParams, etc.
    val createRequest = CreatePublicKeyCredentialRequest(
        requestJson = requestJson,
        preferImmediatelyAvailableCredentials = false
    )

    val credentialManager = CredentialManager.create(activity)

    try {
        val result = credentialManager.createCredential(
            context = activity,
            request = createRequest
        )
        // result.data contains the attestation response as a JSON string
        val responseJson = result.data
            .getString("androidx.credentials.BUNDLE_KEY_REGISTRATION_RESPONSE_JSON")
        // POST responseJson to your server at /auth/passkey/register/complete
    } catch (e: CreateCredentialCancellationException) {
        // User dismissed the prompt — handle gracefully
    } catch (e: CreateCredentialException) {
        // Other failure — log and surface an error to the user
        Log.e("Passkey", "Registration failed: ${e.message}")
    }
}
Sign-in
import androidx.credentials.CredentialManager
import androidx.credentials.GetCredentialRequest
import androidx.credentials.GetPublicKeyCredentialOption
import androidx.credentials.PublicKeyCredential
import androidx.credentials.exceptions.GetCredentialCancellationException
import androidx.credentials.exceptions.GetCredentialException

suspend fun signInWithPasskey(activity: Activity, requestJson: String) {
    // requestJson is the JSON-serialised PublicKeyCredentialRequestOptions
    // from your server — challenge, rpId, allowCredentials, userVerification
    val getCredentialOption = GetPublicKeyCredentialOption(
        requestJson = requestJson
    )

    val getRequest = GetCredentialRequest(
        credentialOptions = listOf(getCredentialOption)
    )

    val credentialManager = CredentialManager.create(activity)

    try {
        val result = credentialManager.getCredential(
            context = activity,
            request = getRequest
        )
        val credential = result.credential
        if (credential is PublicKeyCredential) {
            val responseJson = credential.authenticationResponseJson
            // POST responseJson to your server at /auth/passkey/login/complete
        }
    } catch (e: GetCredentialCancellationException) {
        // User dismissed
    } catch (e: GetCredentialException) {
        Log.e("Passkey", "Sign-in failed: ${e.message}")
    }
}
Common pitfalls
- Missing or wrong
assetlinks.json. The file must be at/.well-known/assetlinks.json, served over HTTPS, and the SHA-256 fingerprint must match the signing certificate used to build the APK you're testing. - Debug vs release signing key mismatch. Your debug build and release build use different signing keys. Add both fingerprints to
assetlinks.jsonduring development, then remove the debug fingerprint before shipping. - Too-low
minSdk. Credential Manager's passkey flow requires API 28+. Users on Android 8 (API 27) or earlier cannot use passkeys. - Using
Fido2ApiClientinstead of Credential Manager. The older FIDO2 API is deprecated. Credential Manager is the supported path as of 2024 and handles both passkeys and passwords in a unified sheet.
Implementing Passkeys with Windows Hello
Unlike iOS and Android, there is no Windows-specific SDK to call from a web application. Windows Hello is a platform authenticator that exposes itself through the standard WebAuthn API in the browser. Chrome and Edge on Windows 11 both support Windows Hello via navigator.credentials.create() and navigator.credentials.get() — the same calls shown earlier in this guide.
The key is in the authenticatorSelection options you pass.
Registration with Windows Hello
// Fetch the challenge JSON from your server first
const response = await fetch('/auth/passkey/register/begin', {
  method: 'POST',
  headers: { 'Content-Type': 'application/json' },
  body: JSON.stringify({ userId: currentUser.id }),
});
const options = await response.json();

options.challenge = base64urlToBuffer(options.challenge);
options.user.id = base64urlToBuffer(options.user.id);

// Force Windows Hello (platform authenticator) and require user verification
options.authenticatorSelection = {
  authenticatorAttachment: 'platform',   // Windows Hello, Face ID, etc. — not a roaming key
  userVerification: 'required',          // Forces Hello PIN / face / fingerprint prompt
  residentKey: 'required',               // Required for discoverable passkey credentials
};

// Set attestation to 'none' — 'direct' triggers a separate user consent dialog
// that surprises most users and rarely adds value for typical web apps
options.attestation = 'none';

const credential = await navigator.credentials.create({ publicKey: options });

// Send the credential to your server
await fetch('/auth/passkey/register/complete', {
  method: 'POST',
  headers: { 'Content-Type': 'application/json' },
  body: JSON.stringify({
    id: credential.id,
    rawId: bufferToBase64url(credential.rawId),
    response: {
      attestationObject: bufferToBase64url(credential.response.attestationObject),
      clientDataJSON: bufferToBase64url(credential.response.clientDataJSON),
    },
    type: credential.type,
  }),
});
Sign-in with Windows Hello
const response = await fetch('/auth/passkey/login/begin', { method: 'POST' });
const options = await response.json();

options.challenge = base64urlToBuffer(options.challenge);
options.userVerification = 'required';

// Optional: restrict to platform authenticators only
// options.rpId = 'yourdomain.com';

const assertion = await navigator.credentials.get({ publicKey: options });

await fetch('/auth/passkey/login/complete', {
  method: 'POST',
  headers: { 'Content-Type': 'application/json' },
  body: JSON.stringify({
    id: assertion.id,
    rawId: bufferToBase64url(assertion.rawId),
    response: {
      authenticatorData: bufferToBase64url(assertion.response.authenticatorData),
      clientDataJSON: bufferToBase64url(assertion.response.clientDataJSON),
      signature: bufferToBase64url(assertion.response.signature),
      userHandle: assertion.response.userHandle
        ? bufferToBase64url(assertion.response.userHandle)
        : null,
    },
    type: assertion.type,
  }),
});
How Windows Hello stores passkey credentials
Windows 11 binds the passkey private key to the device’s TPM 2.0 chip. The credential cannot be exported — it is device-bound and does not sync through a cloud account the way iCloud Keychain or Google Password Manager credentials do. If a user sets up a Windows Hello passkey and later gets a new PC, they will need to re-register.
Common pitfalls
attestation: 'direct'triggers a consent dialog. Windows will show a secondary prompt asking the user to consent to sharing attestation data with the relying party. Most apps don't need attestation data. Setattestation: 'none'unless you have a specific enterprise requirement.- The Windows Hello PIN is a valid authenticator. If a user has not configured facial recognition or a fingerprint reader, Windows Hello falls back to the PIN. This is expected behaviour — the PIN is a platform credential, not a password. The WebAuthn call still succeeds.
- No hardware key when
authenticatorAttachment: 'platform'is set. Setting this forces the OS to use the local platform authenticator only. If you also want to support FIDO2 hardware keys (e.g., YubiKey), omitauthenticatorAttachmentor set it to'cross-platform'separately. - Windows 10 support is limited. Windows Hello passkey support is most reliable on Windows 11. Windows 10 supports WebAuthn but passkey sync and certain credential management features require Windows 11.
Integrating with an Authentication Platform
Building WebAuthn from scratch is doable, but it’s a significant surface area — challenge management, attestation validation, signature counter verification, multi-device sync, and more. Many teams use an authentication platform to handle this instead.
Authgear has built-in support for passkey registration and login. You connect your app to Authgear and the passkey flows — including the WebAuthn ceremony, credential storage, and device management — are handled for you. This is worth considering if your team’s core product isn’t authentication infrastructure. See how Authgear handles passkeys.
Testing Your Passkey Implementation
Test across environments before shipping:
- Registration — create a passkey on at least two different devices/browsers
- Login — verify the authentication flow end to end
- Multi-device — register a passkey on one device, sign in on another (synced passkeys via iCloud Keychain or Google Password Manager)
- Hardware security keys — test with a FIDO2 key if your app needs to support them
- Recovery — simulate a lost device and walk through your recovery flow
Chrome DevTools has a WebAuthn emulator (DevTools → More tools → WebAuthn) that lets you test registration and authentication flows without a physical authenticator.
💡 Try it without writing code first: the free Passkey Demo & WebAuthn Tester creates a real passkey in your browser, then decodes the credential — attestation object, authenticator flags, and public key — so you can see exactly what your server will receive before you build the backend.
Best Practices
Register Multiple Devices
Encourage users to register at least two devices during onboarding. A user who only has one registered device and loses it will be locked out. Multiple devices — or a mix of a synced passkey plus a hardware key — provide a natural fallback.
Design Onboarding for Unfamiliar Users
Many users have never seen a passkey prompt. Show a brief explanation before triggering navigator.credentials.create(): what passkeys are, what will happen next, and that they’re more secure than passwords. A confused user will hit cancel and never try again.
Generate Fresh Challenges Every Time
Every registration and login attempt must use a unique, server-generated random challenge (at least 16 bytes, ideally 32). Challenges must be single-use and short-lived (expire within 5 minutes). Reusing or accepting stale challenges opens the door to replay attacks.
Verify the Signature Counter
Authenticators maintain a signature counter that increments with each use. Your server should store and check this counter. If you receive a counter value lower than the stored one, it may indicate a cloned authenticator — flag it and require re-authentication.
Support Cross-Platform Passkeys
Passkeys can be device-bound (tied to one authenticator, like a hardware key) or synced (backed up via iCloud Keychain, Google Password Manager, or 1Password). Synced passkeys work across a user’s devices automatically. Don’t set authenticatorAttachment: "platform" if you want to allow hardware keys too.
Log Authentication Events
Keep server-side logs of registration attempts, successful logins, failed verifications, and credential deletions. These logs are essential for detecting anomalies — like repeated failed assertions against the same credential — and for debugging when users report problems.
Bottom Line
Passkeys replace shared secrets with cryptographic key pairs that stay on the user’s device. The result is passkey authentication that’s resistant to phishing, immune to credential breaches, and faster for users.
The WebAuthn API is well-supported in all modern browsers. The client-side code is straightforward; the complexity lives on the server — challenge management, assertion verification, and credential storage. Use a server library to handle the cryptographic heavy lifting rather than implementing it yourself.
If you’d rather not manage the infrastructure at all, Authgear provides passkey signup and login out of the box, so your team can focus on building the product instead of the authentication layer.
- Passkey vs Password: Why Passkeys Are the Future of Security
- What Is FIDO2? Complete Guide to FIDO Authentication
FAQs
What is passkey authentication?
Passkey authentication is a passwordless login method that uses public-key cryptography instead of passwords. The user’s device holds a private key; the server stores the matching public key. At login, the server issues a challenge, the device signs it using the private key (after biometric/PIN verification), and the server confirms the signature. No password is ever created, stored, or transmitted.
What is a passkey?
A passkey is the credential created during passkey authentication. It consists of a cryptographic key pair: a public key on the server and a private key locked to the user’s device. Users authenticate with biometrics or a device PIN — the private key never leaves the device.
How do passkeys work technically?
Passkeys use public-key cryptography. The device holds a private key; the server stores the corresponding public key. At login, the server issues a challenge, the device signs it with the private key, and the server verifies the signature. No shared secret is ever transmitted.
What is WebAuthn?
WebAuthn (Web Authentication API) is the browser API that applications use to create and use passkeys. It’s a W3C standard supported in all major browsers.
Are passkeys more secure than passwords?
Yes. Passkeys can’t be phished (they’re domain-bound), can’t be leaked in a server breach (only public keys are stored), and can’t be reused across sites. They’re also resistant to brute-force attacks since there’s no secret to guess.
Can passkeys sync across multiple devices?
Yes. Apple (iCloud Keychain), Google (Password Manager), and Microsoft (Windows Hello) sync passkeys across a user’s devices. Third-party password managers like 1Password and Dashlane also support passkey sync.
Is there a WebAuthn example I can run locally?
Yes. webauthn.io is an interactive WebAuthn demo you can test in your browser without any setup. For a local example, Google’s Build your first WebAuthn app codelab walks through a full registration and authentication flow. The code examples in this article show the client-side WebAuthn calls you’d use in your own app.
How do I create a passkey on iPhone?
To create a passkey on iPhone from a native iOS app, use the AuthenticationServices framework. Your app needs an Associated Domains entitlement (webcredentials:yourdomain.com) and your server must serve an apple-app-site-association file at /.well-known/apple-app-site-association. Call ASAuthorizationPlatformPublicKeyCredentialProvider.createCredentialRegistrationRequest() with a server-issued challenge — the OS handles Face ID or Touch ID automatically. See the iOS section above for a full Swift example.
What is the difference between WebAuthn and a passkey?
WebAuthn is the W3C API (navigator.credentials.create() / .get()) that your code calls to create and verify credentials. A passkey is a WebAuthn credential that syncs across a user’s devices via iCloud Keychain, Google Password Manager, or a similar platform service. All passkeys are WebAuthn credentials, but not all WebAuthn credentials are passkeys — a FIDO2 hardware key (like a YubiKey) is WebAuthn but device-bound and does not sync.
Does Windows Hello support passkeys?
Yes. Windows Hello is a platform authenticator that exposes passkey support through the standard WebAuthn API in Chrome and Edge on Windows 11. There is no Windows-specific SDK — you use the same navigator.credentials.create() call as any other WebAuthn implementation, with authenticatorAttachment: 'platform' and userVerification: 'required' to trigger Windows Hello. Credentials are bound to the device’s TPM 2.0 chip and do not sync across devices.